Contents
Try our demo: → Image Example / Bild
Images can be uploaded within the text editor or by using the media library. The media library can be found at Dashboard –> Media.
Text editor
Click on the Add Media button and the following window will be opened:
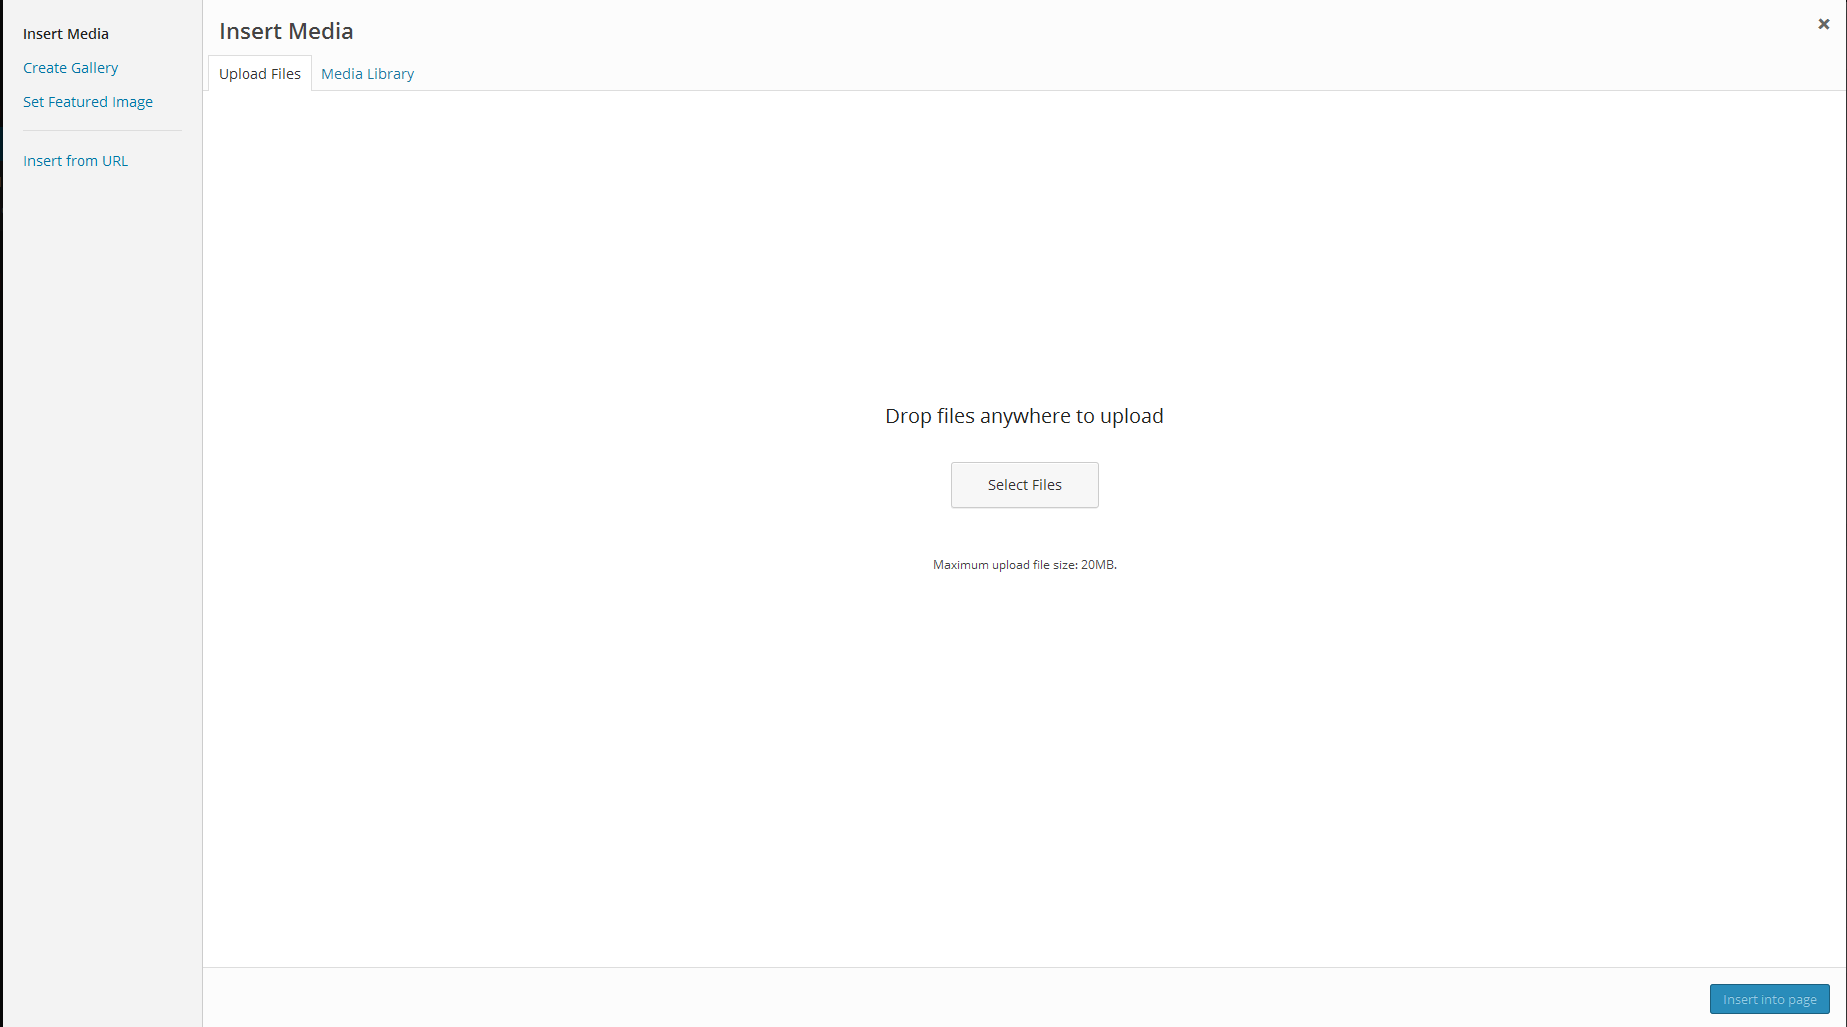
Four different options will appear on the left side: Insert media, Create Gallery, Set Featured Image, Insert from URL. The first three options allow you either to upload pictures or to use pictures already stored at the media library.
Adding images
In order to upload a new image, click on Add Media and then go to Upload Files.
Image files can also be added directly via drag&drop from the data directory into the text editor. These files will then be uploaded to the media library automatically.
Please note: Some characters in file names such as “+” might cause difficulties. Try to remove such characters from file names before uploading the respective images.
You might insert images either immediately at the cursor within the text editor by clicking on Insert into page.
Edit the image before inserting it by clicking on Edit image in the right-handed column.
In addition, the right-hand box shows you some more detailed options such as image title, caption or alternative text. This box is only visible if an image is already selected.
The right-hand box provides also the option to choose whether the image shall be linked to a user-defined URL or to a media file (a click on the image will then open a new window with the original version of the respective image).
If you link the image to an attachment page, a click on the image leads to an attached page that might contain for example further descriptions of the image.
Of course, by choosing none as an option, nothing will happen by clicking on the picture.
Editing images in WordPress
Images can be modified by clicking on "Edit Original". In this menu, aspect ratio, size, viewframe and alignment of the image can be adjusted. To finish the editing process, press the "Save" button. If you want to restore the original version of the image, click on "Restore original picture".
Afterwards, the edited image might be inserted into the the text editor by clicking on "Insert into page".
Further possibilities to insert images
After the "Add Media" button has been pressed, you might also add an image directly from the web. To do this, you have to choose "Insert from URL". Then you can enter the respective URL und finish the process by clicking on "Insert picture into page".
In the "Add Media" menu you have got also the opportunity to determine an image that represents the whole page (this might be relevant if you want to use the image scroller plugin in your blog). This can be done by choosing the option "Set featured image".
Images in the media library
Images can also be stored in the media library. If you open an image in the media library, it can be edited there as well. Furthermore, you can see information about the image such as its name or URL. It is also possible to add descriptions or alternative labels to the image in this menu.
If any changes have been made to an image it will not be necessary to update the respective images on the page where they appear. A click on the button "Update" will be sufficient.
Images and text side by side
Images can be placed side by side to the text on your page with the alignment options which you can find in the tool bar menu in the text editor.

If you choose for example "Align left", you can just write your text besides the picture.